Showing posts with label organization. Show all posts

Making Progress

As some of you may know, we don't start school until September here in Virginia so I am feeling a little behind when I see all of the super cute classrooms that are already put together. With that being said, I decided to go in and begin doing some serious work and I'm starting to FINALLY make some progress! I changed my classroom arrangement A LOT this year because of all the wonderful lessons I learned in my first year of teaching! I am going to still be implementing Daily 5 structure for reading and I'm going to begin to implement Guided Math which will be new to me this year. I also found out that I NEVER used my desk so I had that removed from my classroom.  Here are some progress pics so far! Feel free to leave some feedback if you have any suggestions.  (Just keep in mind that I am extremely cramped for space, even though the pictures don't really show it!) I promise to do a full classroom reveal when it is all finished (even if that isn't until September!)


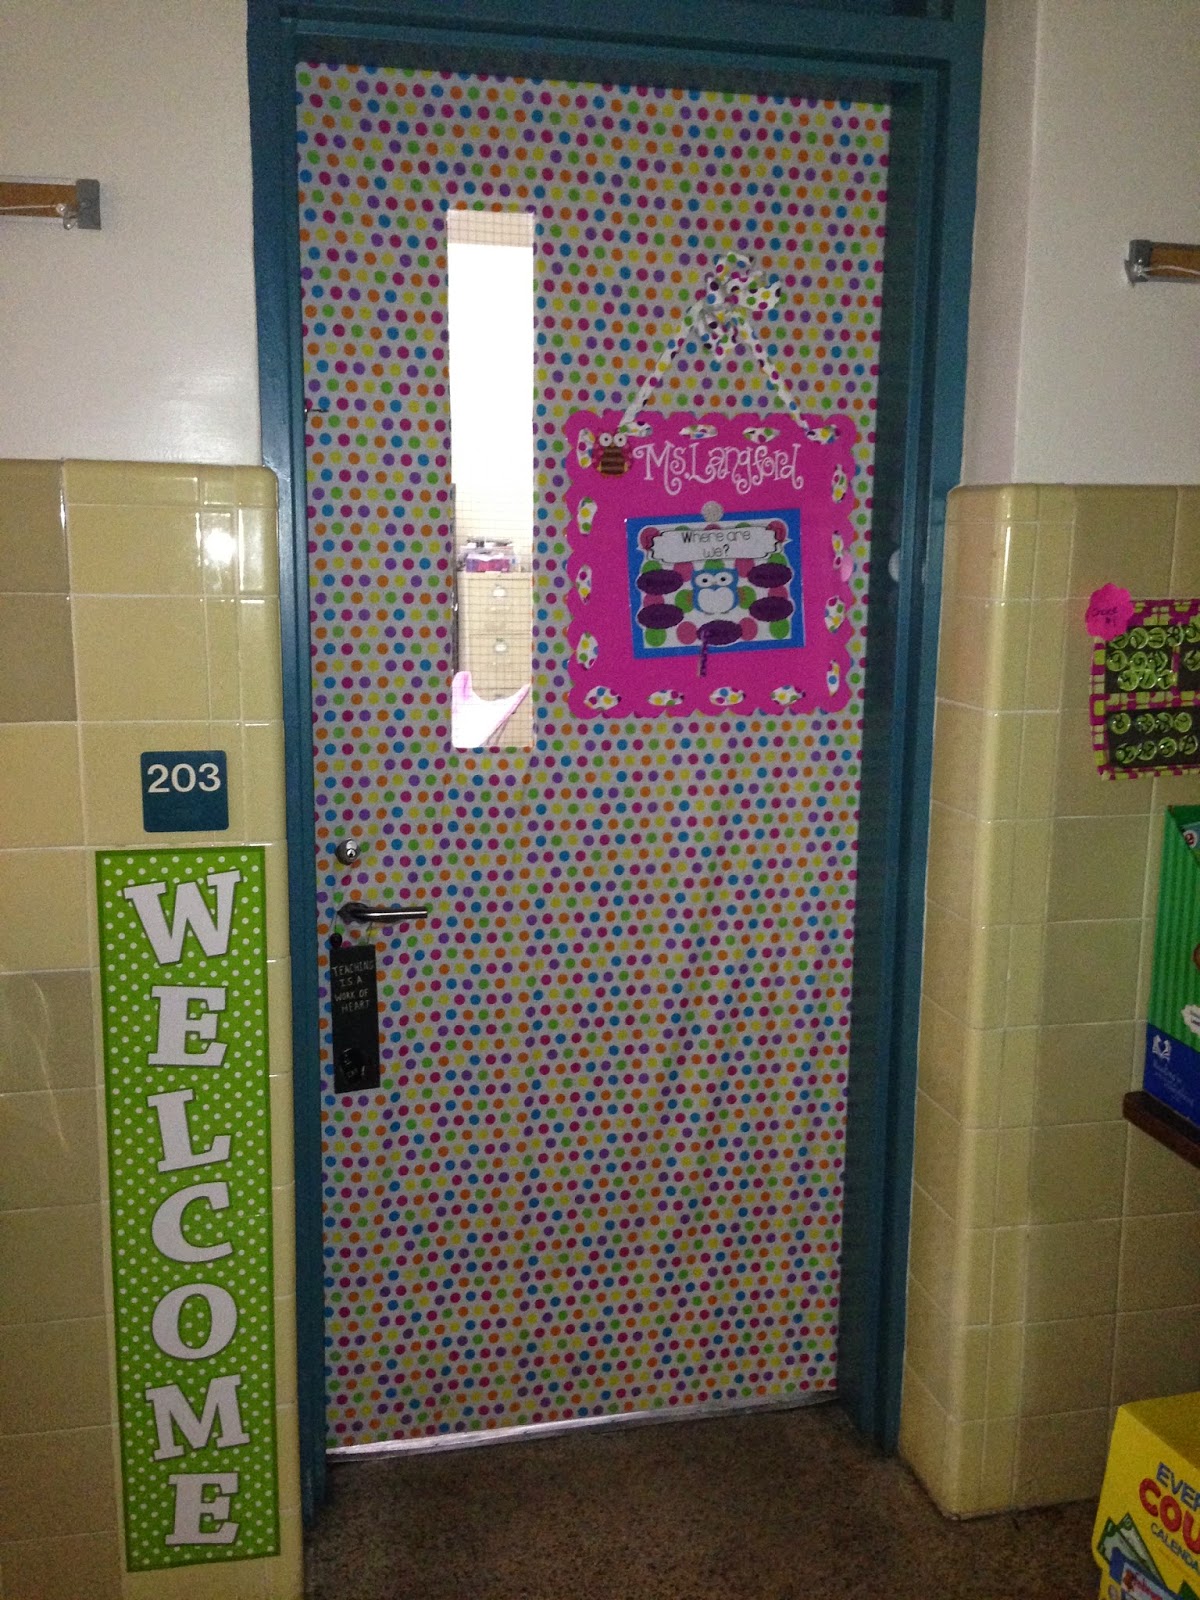
My classroom door with my EDITABLE "Where Are We?" FREEBIE sign that you can find here at my TpT store!

Daily 5/Guided Math groups for accountability.  Children will check in at each round.  Magnets are a DIY that you can find the tutorial for on my blog!

Reading corner so far with my fabulous new futon and crate seats! Also find the tutorial for the crate seats on my blog!

Kidney Table~ Crate Seat Tutorial also on the blog!!

Twitter board with iPhones to be used as exit slips and formative assessments. iPhones are attached with velcro so that students can take them down.  iPhones are laminated so that we can use dry erase markers.  Can't wait to teach these 4th graders how to #hashtag!

Finally, here is a new organizational method I'm using for Math manipulative storage. Drawers are labeled with SOL strand and have specific SOL's on the labels (Virginia's standards). Since I'll be using a Guided Math structure this year, I wanted students to be able to access manipulatives whenever they need them.  Hoping this will do the trick! Manipulatives are stored in large gallon sized ziplock bags or the boxes they came in.


Lastly, I want to take a moment to talk about my newest product that I hope you'll go check out! It's a 4th Grade Math Interactive Notebook that includes Common Core Standards AND Virginia SOL's.  It is an August-December bundle and is currently on SALE! Great price for a great product! I hope you'll check it out! The full description and product can be found here at my TpT store! Leave me some feedback if you like it!! 


Also, don't forget to "like" me on Facebook and follow me on Instagram (bnlangford) for more ideas/giveaways/etc.

Happy Back to School!!


Magnet Tutorial


I hope that everyone has had a fabulous summer! I know that so many of us are in "back to school" mode, especially those of you starting school in a few weeks.  I wanted to share a tutorial for these super cute magnets that I made :) I saw the idea somewhere on Pinterest and tweaked it for myself to make it a little easier and cheaper.  Here is what you'll need:

~Flat glass stones (I got mine at the Dollar Tree but you can also find them on Amazon)
~Scrapbook paper of choice (I used a pack I had already purchased from Michaels that I keep for crafts)
~Black Sharpie
~Hot glue (any craft store, Wal-Mart, etc.)
~Round magnets (I found mine at Handcock fabric and used my teacher discount!)

Total price= $13.00 to make 100 magnets.  (I needed 3 sets of 30 and then had some left over) I purchased everything except the scrapbook paper and hot glue since I already had those.  

(The cookie sheets pictured are not necessary for this project.  They are just what I'm using to put my magnets on in my classroom!)

Step 1: Choose your scrapbook paper and lay it out on the table.  Using a sharpie, write student numbers on the scrapbook paper (no larger than the rocks). Make sure to spread the numbers out so that you can glue the rocks on top.  

*** Skip this step if you are not numbering your magnets.  I numbered mine with student numbers but if you are just using them for decoration, move on to Step 2.  


Step 2: Next, take your flat glass rocks and hot glue them on top of the numbers (or on top of the paper if you're not numbering your magnets) as shown in the picture below. I put a circle of glue around the number and placed the rock on top of it.  I learned quickly that I can't see where I put the glue through my rocks which is a huge plus!  Make sure to center your rock over the number so that it is even.  WARNING: The rock will magnify your writing slightly so make sure you don't write your numbers too big.


Step 3: When you're finished gluing down your rocks on top of your numbers, you should have a row of rocks as shown below.  Next, simply cut them out making sure to neatly trim the edges so that you can't see any access paper from the front.


Step 4: Lastly, turn all of your magnets upside down.  Using the hot glue gun, glue a magnet to the back of each rock.  I bought self adhesive magnets for that extra support.  I peeled off the back to the magnets and then hot glued them.  I'm hoping this will make them more durable.  


I totally should have gotten a manicure before doing this tutorial! 

Now, this is what the finished product should look like! (This finished product is another set that I made with different paper.  I can't seem to find the picture of the polka dot papered magnets, but same thing!!)


Some of you may be wondering what I plan to do with 100 magnets?? Well, I saw a super cute bulletin board on Pinterest where you use cookie sheets as magnet boards and students can move their magnets for groups, centers, etc... Since I do Daily 5 in my classroom, I plan to have a bulletin board for Daily 5 rounds (Read to Self, Read to a Buddy, Word Work, Work on Writing) to hold students accountable for their choices.  Following the Daily 5 model, students are supposed to check in before each round.  Magnets will be a super fast way to do this.  

Next, I plan to do have a Math bulletin board for Guided Math groups (which I don't completely have planned out yet since this will be my first year really implementing Guided Math). 

Lastly, I needed a third set of 30 magnets for students to check in each morning by doing lunch count.  A cookie sheet will be hanging on the back of my classroom door with different sections.  Each morning, students will use their magnet to their lunch choice and this is also how I will take attendance.  

When I begin to set up my classroom, I will be sure to add pics to the blog so that you can see the final product! I'll also be adding a lot of other cool organizational tips that I learned my first year of teaching! 

Please follow me at my TpT store and "like" me on Facebook to see all of my posts, products, and giveaways!!!

Thanks for stopping by! 


Property Labels!

Today I was leveling some books for my classroom library and I noticed that with all of the business of my first year of teaching, I never labeled my books as MINE! I certainly can't afford to be losing these books that people have so generously donated to me.  With that being said, I hope that you'll hop on over to my store and download my newest FREEBIE! I made some labels for my books (and any other personal property in my classroom) that are completely editable for you to enter your own name and/or words you may choose to use! Here is what they look like:


These labels fit Avery Standard 3110 Sticker labels! Click here to download yours for FREE! Don't forget to leave some feedback at my store! 

Thanks for stopping by! 


New Product

Hi all! I am writing today because I posted new product at my TpT store .  It is a completely editable binder(s) and dividers pack to get all organized for next year.  This year my files were kind of a mess and I was just trying to stay afloat and not drown.  Next year I will be prepared with this pack that I've created! I have cover pages for multiple binders, dividers, and editable forms for inside the binders.  This is great because since it is editable, you can re-print and re-use year after year! Below are some pictures of what the new product looks like! I hope you'll check it out! Don't forget to "like" my Facebook page and follow this blog! 


FREEBIE ALERT!

FREEBIE alert!!!! Visit my TpT store for the newest classroom organization/decor product! It is a "Where are we?" sign for your classroom door to let others in the building know where to find you.  Click here to download yours now! The product comes in two themes: polka dot and chevron.  Please leave my store a nice rating if you love this product as much as I do! Also, please "like" my store on Facebook .  Here is a preview of what the sign looks like: 

Thanks for looking!!!